2016年9月29日 星期四

Lora module development project

1.Lora 是一種無線傳輸技術,適用於傳輸資料量低(例如9600bps),遠距離,抗干擾,且對障礙物有高穿透性.

2.Lora GHz 以下的工作頻率及展頻技術來達到傳輸目標.
@低工作頻率相對於2.4G會有較好的穿透性.
@Lora展頻技術是以1MHz的頻寬來傳輸資料,以一般無線電收發機來說其佔用的頻寬為10KHz. Lora可想像為同時使用100個無線電收發機頻道來傳輸資料因此具有抗干擾的特性

3.本次實作使用大陸製433MHz Lora module, 可使用的頻率介於410 ~ 441 MHz1MHz頻寬間隔, module可透過廠商提供的軟體做設定或是以Uart界面直接以軟體來設定.

4.控制Lora moduleMCUSTM32L100 Discovery board

5.實作的用途為F3F競賽計時裝置.共需要三個Lora module – Base / Point A / Point B. 此設備設置於戶外Point A / B距離 100m Base約在Point A / B連線的中間.競賽時由Base計時, Point A / B有裁判按按鍵透過Lora通知Base發出聲音提示選手及在飛機來回通過Point A /B適當次數後停止計時並顯示所耗用時間(100m飛十趟計時,時間短為勝).

6.由於場地於戶外且Base Point A / B 間會有樹叢/芒草阻隔,曾以2.4G – 1W 模組實作訊號幾乎完全被遮蔽.Lora module 100mw實際測試戶外三個地點完全沒有掉資料,外接的天線也不需特別架高.


Point A / B 按鍵裝置外觀


Point A / B 按鍵裝置內部 Lora module / STM32L100 / 三洋低自放 2000mA NiMh電池


Base 計時器外觀,右邊為Lora module天線


Base計時器內部


Base 計時器 / Point A/ B 完整設備


Point A 的視野


設備測試

2016年7月6日 星期三

PJSIP with WebRTC AEC on embedded Linux

While studying open source AEC (Acoustic Echo Cancellation) on the internet, I found that google release an open source project called WebRTC can do good job. There are more good news that PJSIP can work with WebRTC AEC. Then I found there are few information about how to get them work. After some research, finally it works. Below is my procedure.

1.Software

pjproject-2.5.1
http://www.pjsip.org/release/2.5.1/pjproject-2.5.1.tar.bz2

webrtc-audio-processing
https://www.freedesktop.org/software/pulseaudio/webrtc-audio-processing/#download

The "offical" WebRTC needs a lot of other tools to compile (No autoconf / Makefile) and makes everything difficult.

2.Environment
iMX6 / arm-cortex A9
Embedded Linux / buildroot

3.Compile webrtc-audio-processing

# cd webrtc-audio-processing
# ./autogen.sh
# CFLAGS="-march=armv7-a -mfpu=neon -mfloat-abi=softfp -O2" CXXFLAGS="-march=armv7-a -mfpu=neon -mfloat-abi=softfp -O2" CC=arm-buildroot-linux-gnueabi-gcc CXX=arm-buildroot-linux-gnueabi-g++ AR=arm-buildroot-linux-gnueabi-ar ./configure --host=arm-linux --target=arm-linux --prefix=/home/gigijoe/imx6sabre/sysroot --cache-file=/dev/null
# make

Copy ./webrtc/modules/audio_processing/.libs/libwebrtc_audio_processing.so.1.0.0 to your target

4.Compile PJSIP

Patch pjproject-2.5.1/aconfigure

##################################################

--- ./pjproject-2.5.1.original/aconfigure 2016-05-18 00:01:59.000000000 +0800
+++ pjproject-2.5.1/aconfigure 2016-07-05 21:27:12.514799348 +0800
@@ -7438,7 +7438,8 @@
   if test "x$with_webrtc" != "xno" -a "x$with_webrtc" != "x"; then
         WEBRTC_PREFIX=$with_webrtc
-   WEBRTC_CFLAGS="-I$WEBRTC_PREFIX/src"
+   #WEBRTC_CFLAGS="-I$WEBRTC_PREFIX/src"
+ WEBRTC_CFLAGS="-I$WEBRTC_PREFIX"
  case $target in
     *-apple-darwin_ios*)
@@ -7453,8 +7454,10 @@
  esac
  ;;
     *mingw* | *cygw* | *win32* | *w32* | *darwin* | *linux* | *android*)
-        WEBRTC_LDFLAGS="-L$WEBRTC_PREFIX/src/out/Release"
-        WEBRTC_LIBS="-laudio_processing_sse2"
+        #WEBRTC_LDFLAGS="-L$WEBRTC_PREFIX/src/out/Release"
+ WEBRTC_LDFLAGS="-L$WEBRTC_PREFIX/webrtc/modules/audio_processing/.libs"
+        #WEBRTC_LIBS="-laudio_processing_sse2"
+ WEBRTC_LIBS="-lwebrtc_audio_processing"
  ;;
     *)
  ;;
@@ -7467,7 +7470,7 @@
  WEBRTC_LDFLAGS=""
   fi
-  WEBRTC_LIBS="$WEBRTC_LIBS -laudio_processing -lcommon_audio -lsystem_wrappers"
+  #WEBRTC_LIBS="$WEBRTC_LIBS -laudio_processing -lcommon_audio -lsystem_wrappers"
   SAVED_LIBS="$LIBS"
   SAVED_LDFLAGS="$LDFLAGS"

##################################################

# cd pjproject-2.5.1
# ac_cv_lib_audio_processing_WebRtcAec_Process=yes CC=arm-buildroot-linux-gnueabi-gcc CXX=arm-buildroot-linux-gnueabi-g++ AR=arm-buildroot-linux-gnueabi-ar ./configure --host=arm-linux --target=arm-linux --prefix=/home/gigijoe/imx6sabre/sysroot --with-webrtc=$PWD/../webrtc-audio-processing --cache-file=/dev/null
# make

Copy ./pjsip-apps/bin/pjsua-arm-unknown-linux-gnu to your target

5.Running and test
pjsua-arm-unknown-linux-gnu --ec-opt=3 --ec-tail=30

Then make a call to test

6.AEC performance 

This is the best result of echo cancellation among open source AEC I have ever tested.
Very close to commerical product.

By enabling NEON hardware floating, the CUP usage while talking (G.711 uLaw) is around 2% ~ 20% 


2016年6月4日 星期六

QT5 EGLFS rotate screen for QT5.5

去年發表過一篇關於在QT5.4上screen旋轉90度的文章

http://stevegigijoe.blogspot.tw/2015/03/qt5-eglfs-rotate-screen.html

今年升級到QT5.5發覺EGLFS相關的程式碼有些許更動,screen旋轉90度必須重寫.

網路上有大陸的網友已經完成這個功能,省了我不少時間.

http://blog.csdn.net/neyes/article/details/48517119

不過跟著實際修改後還是有點問題,因此我再多做了一些修改.


**************************************************


--- output/build/qt5base-5.5.0/src/platformsupport/platformcompositor/qopenglcompositor.cpp 2015-06-30 04:04:38.000000000 +0800
+++ ../buildroot/output/build/qt5base-5.5.0/src/platformsupport/platformcompositor/qopenglcompositor.cpp 2016-06-04 19:41:01.716707272 +0800
@@ -123,7 +123,12 @@
     glClear(GL_COLOR_BUFFER_BIT | GL_DEPTH_BUFFER_BIT | GL_STENCIL_BUFFER_BIT);

     const QRect targetWindowRect(QPoint(0, 0), m_targetWindow->geometry().size());
+#if 0
     glViewport(0, 0, targetWindowRect.width(), targetWindowRect.height());
+#else
+    // rotate 90
+    glViewport(0, 0, targetWindowRect.height(), targetWindowRect.width()); //swap width / height
+#endif

     if (!m_blitter.isCreated())
         m_blitter.create();
@@ -185,9 +190,14 @@
     const QRect clippedRectInWindow = rectInWindow & clipRect.translated(rectInWindow.topLeft());
     const QRect srcRect = toBottomLeftRect(clipRect, rectInWindow.height());

+#if 0
     const QMatrix4x4 target = QOpenGLTextureBlitter::targetTransform(clippedRectInWindow, targetWindowRect);
+#else
+    QMatrix4x4 target = QOpenGLTextureBlitter::targetTransform(clippedRectInWindow, targetWindowRect);
+    target.rotate(90, 0, 0, 1);
+#endif
     const QMatrix3x3 source = QOpenGLTextureBlitter::sourceTransform(srcRect, rectInWindow.size(),
-                                                                     QOpenGLTextureBlitter::OriginBottomLeft);
+                                                                     QOpenGLTextureBlitter::OriginBottomLeft);  

     blitter->blit(textures->textureId(idx), target, source);
 }
@@ -213,13 +223,23 @@
         if (textures->count() > 1 && i == textures->count() - 1) {
             // Backingstore for a widget with QOpenGLWidget subwidgets
             blend.set(true);
+#if 0
             const QMatrix4x4 target = QOpenGLTextureBlitter::targetTransform(textures->geometry(i), targetWindowRect);
+#else
+            QMatrix4x4 target = QOpenGLTextureBlitter::targetTransform(textures->geometry(i), targetWindowRect);
+            target.rotate(90, 0, 0, 1);
+#endif
             m_blitter.blit(textureId, target, QOpenGLTextureBlitter::OriginTopLeft);
         } else if (textures->count() == 1) {
             // A regular QWidget window
             const bool translucent = window->sourceWindow()->requestedFormat().alphaBufferSize() > 0;
             blend.set(translucent);
+#if 0
             const QMatrix4x4 target = QOpenGLTextureBlitter::targetTransform(textures->geometry(i), targetWindowRect);
+#else
+            QMatrix4x4 target = QOpenGLTextureBlitter::targetTransform(textures->geometry(i), targetWindowRect);
+            target.rotate(90, 0, 0, 1);
+#endif
             m_blitter.blit(textureId, target, QOpenGLTextureBlitter::OriginTopLeft);
         } else if (!textures->flags(i).testFlag(QPlatformTextureList::StacksOnTop)) {
             // Texture from an FBO belonging to a QOpenGLWidget


**************************************************

--- output/build/qt5base-5.5.0/src/plugins/platforms/eglfs/deviceintegration/eglfs_viv/qeglfsvivintegration.cpp 2015-06-30 04:04:43.000000000 +0800
+++ ../buildroot/output/build/qt5base-5.5.0/src/plugins/platforms/eglfs/deviceintegration/eglfs_viv/qeglfsvivintegration.cpp 2016-05-30 14:43:28.698792014 +0800
@@ -53,8 +53,14 @@
 
     mNativeDisplay = fbGetDisplayByIndex(framebufferIndex());
     fbGetDisplayGeometry(mNativeDisplay, &width, &height);
+#if 0
     mScreenSize.setHeight(height);
     mScreenSize.setWidth(width);
+#else
+    // rotate 90
+    mScreenSize.setHeight(width);
+    mScreenSize.setWidth(height);
+#endif
 }
 
 QSize QEglFSVivIntegration::screenSize() const
@@ -71,8 +77,12 @@
 {
     Q_UNUSED(window)
     Q_UNUSED(format)
-
+#if 0
     EGLNativeWindowType eglWindow = fbCreateWindow(mNativeDisplay, 0, 0, size.width(), size.height());
+#else
+    // rotate 90
+    EGLNativeWindowType eglWindow = fbCreateWindow(mNativeDisplay, 0, 0, size.height(), size.width());
+#endif
     return eglWindow;
 }


2016年4月17日 星期日

DIY E38 舊式卡匣主機改裝藍芽


0) 上次的卡帶主機改裝

http://stevegigijoe.blogspot.tw/2016/03/diy-e38-mp3.html

使用一陣子便覺得還是不太方便,有以下幾個問題
1.USB Disk內有幾百首歌,用遙控器還是很難選擇到想要聽的歌曲.
2.mp3解碼板預設的輸出音量太小,用遙控器可增加音量但沒有記憶音量功能,因此每次熄火後都要重新設定音量.
3.mp3解碼板沒有獨立開關,音響切換至FM/CD時mp3解碼板仍然持續運作.

幾經思考後決定增加藍芽模組,這樣便可以使用手機來選取歌曲並控制(記憶)音量.
另外還可以實現免持通話的功能


1) 規格

藍芽 CSR8645 Bluetooth 4.0 模組
HFP v1.6 wideband speech (HD voice ready)
HSP v1.2
A2DP v1.2
AVRCP v1.4

支援無線音樂播放/無線語音通話
支援Aux in - 自動切換 藍芽/Aux in 輸出
支援回音消除/噪音抑制
支援APT-X無損音頻

wav/mp3播放器(320Kbps)
支援SD/USB/紅外線遙控

2) 架構

mp3解碼板音源輸出仍然跨接在廢除的AM線路上,藍芽模組音源輸出則接到卡帶主機音源處理IC的前級輸入端.
藍芽模組Aux in端則接到卡帶主機音源處理IC的增益輸出端.這樣一來在藍芽沒有連線,沒有聲音輸出或藍芽模組斷電時就能聽到FM或mp3解碼板播放的聲音.


1.mp3解碼板輸出(mp3 Out)接到 TDA7318 pin 10 / 14 (廢除AM Radio)
2.藍芽輸出(BT Out)接到 TDA7318 pin 16 / 6 電容之前
3.藍芽Aux in(BT Aux)接到 TDA7318 pin 17 / 7 (這樣不使用藍芽時就能聽 mp3 / FM)


4.外加一個電源切換開關,切換供電給 藍芽模組 或 mp3解碼板 / FM收音機
5.藍芽模組外接麥克風
6.卡帶主機 SB 按鍵廢除,轉接作為藍芽 放音/暫停/通話/掛斷 鍵
7.卡帶主機 < > 按鍵廢除,轉接作為藍芽 上一首/下一首/音量小/音量大 鍵

3) 實作

1.依據之前的改裝再加上藍芽模組而已,主要還是TDA7318D的接線要正確.


2.所有接到TDA7318D的線組一定要固定好,因為焊點都很小,很容易不小心就扯斷了.
3.所有走音源信號的線盡量使用遮蔽線.
4.音源地不要直接接地,照之前的方式接觸在電容外殼上.實際測試這樣就真的完全沒有電流雜音.

5.mp3解碼板/藍芽模組用一個開關及繼電器來切換


6.卡帶主機按鍵 SB / < / > 的電路割開轉接至藍芽模組控制鍵


7.麥克風以橡皮套包覆開一小孔並置於卡帶主機面板正面,良好擺置麥克風才能避免語音通話時迴音及噪音問題.


8.藍芽模組及mp3解碼板電源接到卡帶主機12V Dir及GND


4) 音量調整

音量要調整到FM / mp3解碼板 / 藍芽 大小差不多,否則在聲源切換時要每次手動調整音響主音量會造成使用上不好的體驗.

1.切換到FM Radio調整音響主音量至合適大小.
2.手機連線至藍芽並播放音樂,接著調整手機上藍芽音量設定直到合適大小.
3.若還是太小聲,調整手機上媒體音樂音量設定直到合適大小.
4.手機撥打語音通話,調整手機上語音通話音量設定直到合適大小.
5.藍芽音量與使用的手機也有很大關係,不同手機音量的大小很可能有差異.
6.若手機上的音量都已經調整到極限,音量還是太小聲,唯一的方式只能修改藍芽模組上的前級輸出增益.

5) 使用操作

1.開啟音響並開啟藍芽開關,此時藍芽模組會自動與手機連線.
2.音響選擇FM/AM,手機選擇音樂播放.
3.卡帶主機按SB鍵暫停播放,再次按SB鍵繼續播放音樂.
4.卡帶主機按 > 鍵跳下一首音樂,按 < 鍵跳上一首音樂.
5.從手機撥電話出去或有來電則自動暫停音樂播放進入語音通話模式.
6.卡帶主機按 > 鍵放大音量,按 < 鍵縮減音量.
7.卡帶主機按SB鍵掛斷電話,之後音樂自動繼續播放.
8.關閉藍芽開關(mp3解碼板上電),之後自動收聽FM或AM (mp3解碼板輸出).
9.Android手機無法用SB鍵接聽Line語音通話,iPhone據說可以不過我沒有測試過.


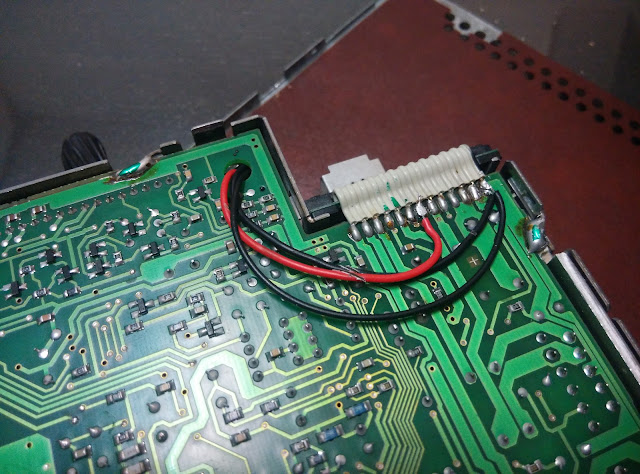
6) 藍芽模組amp預設的輸出增益在E38上明顯不夠大需動手修改.將下圖中兩顆電阻換成100k歐姆即可


2016年3月25日 星期五

DIY E38 舊式卡匣主機改裝播放mp3

十幾年的老車音響是不支援播放mp3的,因為當時mp3還沒流行,CD主機還是主流.
雖然我很少在車上聽音樂,不過音響不能放mp3總是個無法擺脫的疙瘩.

經過一番研究有大陸廠商製造給E38用mp3播放器.它的作法是拆除CD換片箱,將mp3播放器轉接至CD換片箱線組上讓音響主機"誤認"成CD換片箱.坦白說我買了一組回來裝,但是裝在我的2000年E38上不會動,這東西不便宜也要好幾千台幣啊...

心有不甘之下在網路上找了許多資料(老車的好處之一, 參考資料多),發現有老外改裝Aux in,用音源線由iPod或手機輸出給音響播放,改裝方式也不複雜應該也可以用mp3解碼板來作為輸入音源.

http://www.bimmerforums.com/forum/showthread.php?1553860-HowTo-gt-AUX-IPod-connection-using-AM-input

1.系統架構

改裝舊式卡匣主機,將mp3解碼板接到音源處理IC - AM radio 的輸入端.
也就是說廢除AM收音機的音源改接到mp3播放器,因此音響面板切換至AM收音機就能聽到mp3播放.


    USB / SD card
___________________________
|                                                     |
|                 mp3解碼板                 |      
|__________________________ |
    |          |          |          |          |
    | 左     | 音     | 右     | 9V    | 接
    | 音     | 源     | 音     |          | 地
    | 源     | 地     | 源     |          |
    |        _|_        |          |          |
    |                     |          |          |
__|_____ _____|_____|_____|____
| 14                  10        2         3       |
|                                                       |
|              音源處理IC                     |
|                 TDA7318                      |
|___________________________|

整個改裝過程只需要動到五條線

2.準備工具

T10梅花內六角螺絲起子 - 拆卸卡匣主機用
平頭螺絲起子 - 移除排線connector用 / 撬開機殼用
焊槍/銲錫

3.動手拆解

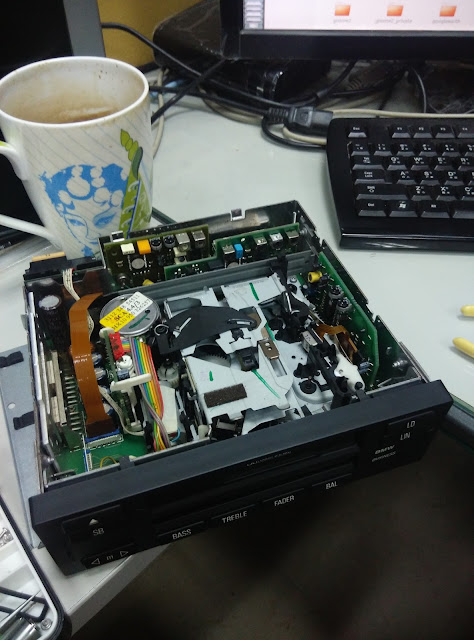
將舊式卡匣主機從車上拆卸出來,並打開上蓋.
鬆開四顆梅花內六角螺絲取出卡帶機心.


4.研究改裝部位

先找到 TDA7318D這顆IC,比對datasheet確定pin 腳順序


AM音源是接到 pin 10 及 14 (左右聲道)
這顆TDA7318的工作電壓VDD是9V的,我選的mp3解碼板工作電壓也是9V所以可以使用同一個電源,省去電壓轉換的麻煩.另一額外的好處是改裝線不會亂都在附近.


5.準備mp3解碼板

這個在掏寶網有許多選擇,重點要挑 工作電壓9V 以及 不要有功放的板子(不要內建擴大器)

6.開始改裝

第一步要先用烙鐵解焊並翹起 TDA7318的pin 10 及 14 斷開AM radio音源輸入.
這個部份要特別小心千萬不要把IC腳折斷了.

第二步將mp3解碼板左音源接到TDA7318的pin 14 / 右音源接到TDA7318的pin 10

第三步將mp3解碼板的VDD接到TDA7318的pin 2 / GND接到TDA7318的pin 3

第四步將TDA7318旁邊那顆電容的藍色外皮剝除,mp3解碼板的音源地線剝除外皮繞在電容上,注意,不需要焊接.


到這裡已經完成大部分工作囉

特別注意在上電前一定要先確定pin2 / pin3沒有短路喔

7.mp3解碼板位置

mp3解碼板上沒有任何按鍵,是透過遙控器操作,紅外線接收器一定要露出音響面板正前方.
另外USB / SD card也需要空間方便存取.因此就安裝在卡匣插入孔位處以雙面膠加上熱溶膠固定即可


以上就大功告成囉